


Delimited accelerates application development by letting developers configure and embed a pre-built widget to let their users upload CSV files into the application. No more time needs to be spent writing upload, validation, mapping, UI, testing, and maintenance code.
This is a tutorial to walk you through the most important features of Delimited and show you how it will save you development time.
Background
You are a developer building an application that will help expecting parents pick their baby's new name. As part of this app, you will be displaying trend data about popular baby names over time. Fortunately, you've found that the government publishes information about baby name popularity yearly in the form of CSV (comma-separated value) files (for example, see this link on Data.gov). You have come to an agreement with the Social Security clerks in each state that they will upload the latest baby name information directly into your application every year. You know that these clerks are not always the most technical users and want a nice interface for them to use.
Here is an example of the type of file a clerk would be uploading:
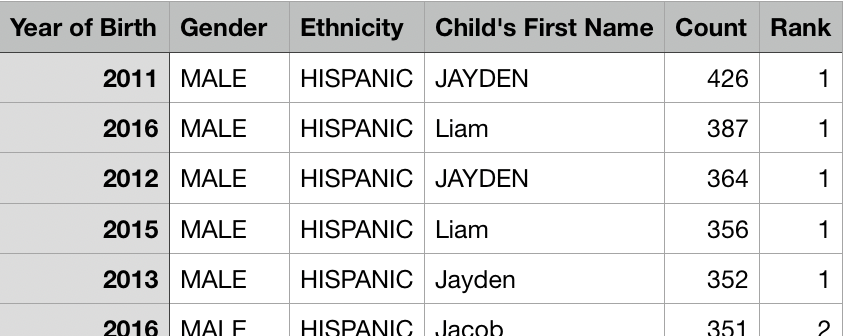
Scratch vs. Delimited
Let's pause for a minute and talk about what building something like this from scratch would entail. Many developers have fallen into the trap of assuming that building a CSV upload capability is simple. You would need to build at least the following components:
- Tasteful user interface that allows clerks to pick the CSV file on their computer
- Client-side error handling and preliminary validation to ensure that the file was in the correct format
- A mapping user interface that allowed clerks to map their file's column names to what your server expects
- Upload mechanism to transfer the file from the clerk's computer to your server
- A server-side processing step to further validate the data, clean and format it to match your domain, and store it somewhere useful to your application
- Client-side error handling and ability to download rows with errors to allow retrying
What always starts as a simple requirement to add CSV uploading inevitably ends up taking weeks of time and debugging effort for every application that needs to support it.
Fortunately, you don't need to waste all that time and money! Delimited does all of this for you, and more, in a fraction of the time. In addition to the above list of features, Delimited also provides:
- Robust and resumable uploads for spotty network connections
- Configuration to account for the varying ways users format their files (e.g., with/without headers or different column names)
- Default values for when users leave columns blank
- Audit record of when files were uploaded
Let's see how simple it is to build this in Delimited.
Create a Schema
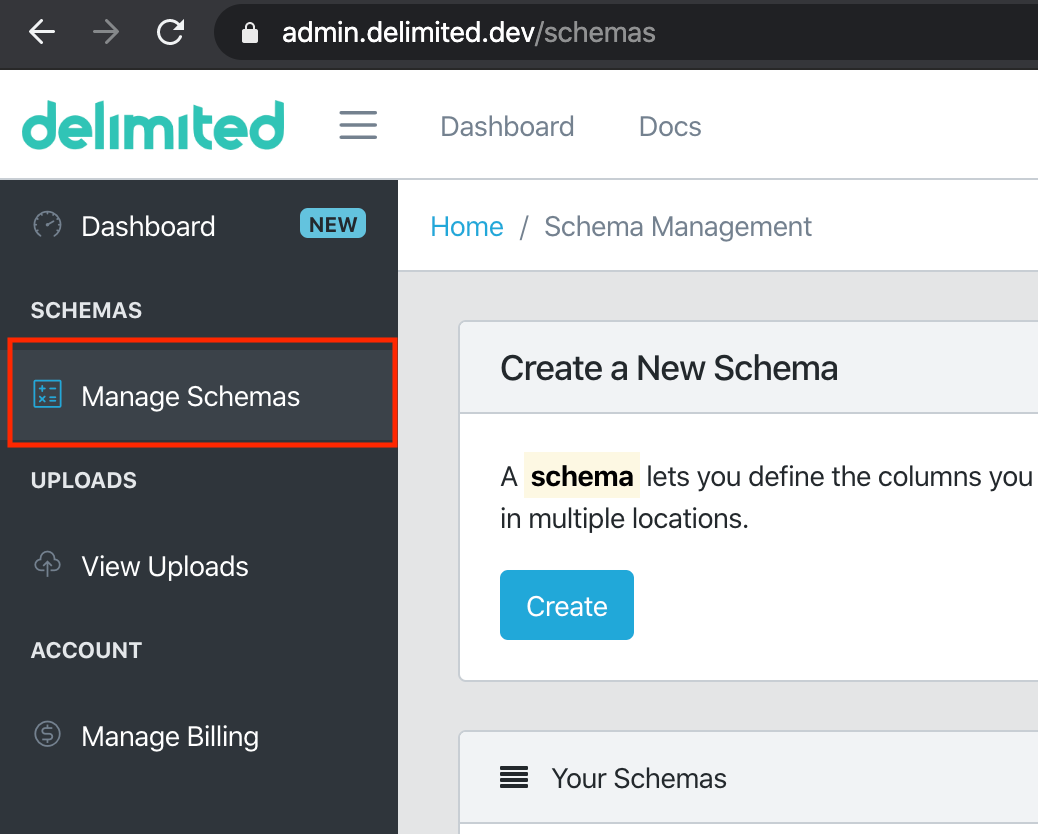
Sign in to the admin dashboard and click "Create
To get started, access your administrator dashboard. Click on "Manage Schemas." We will be creating a new schema, so click on the "Create" button.
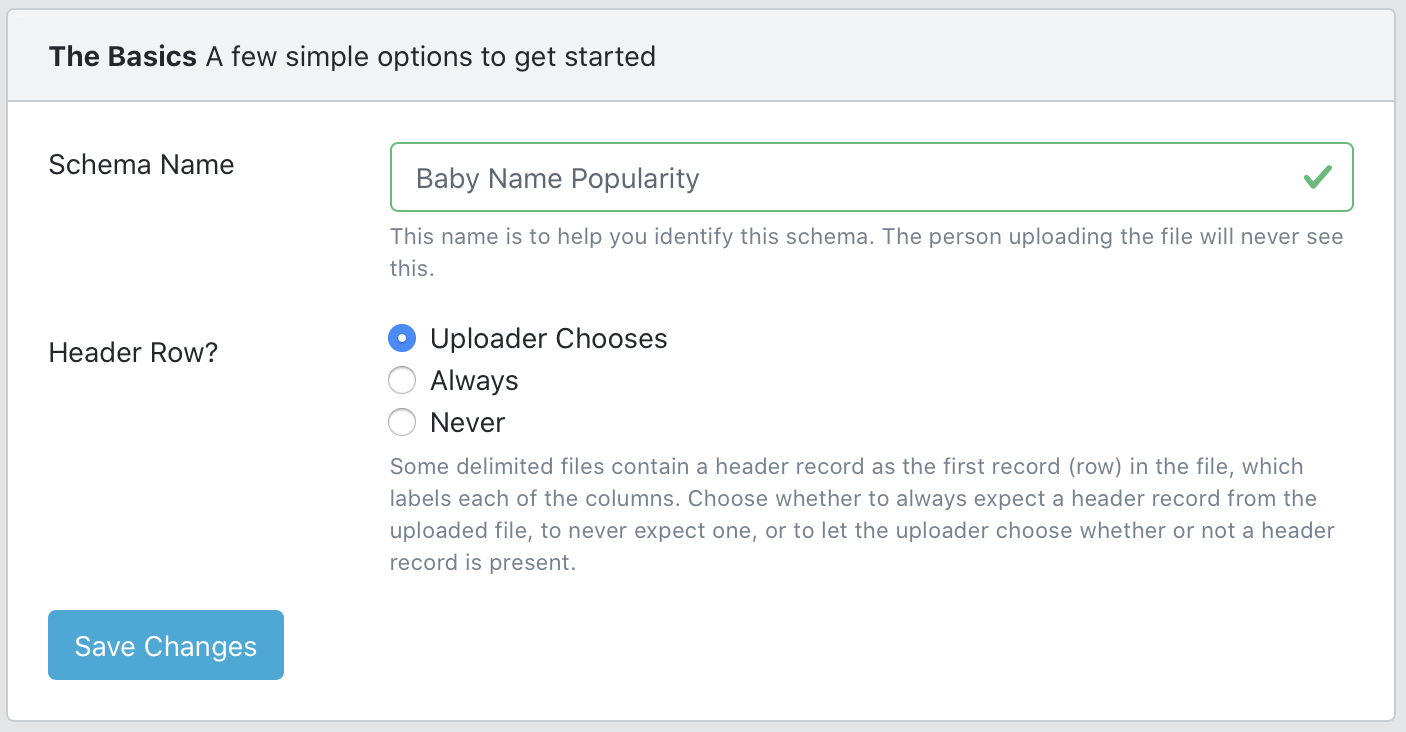
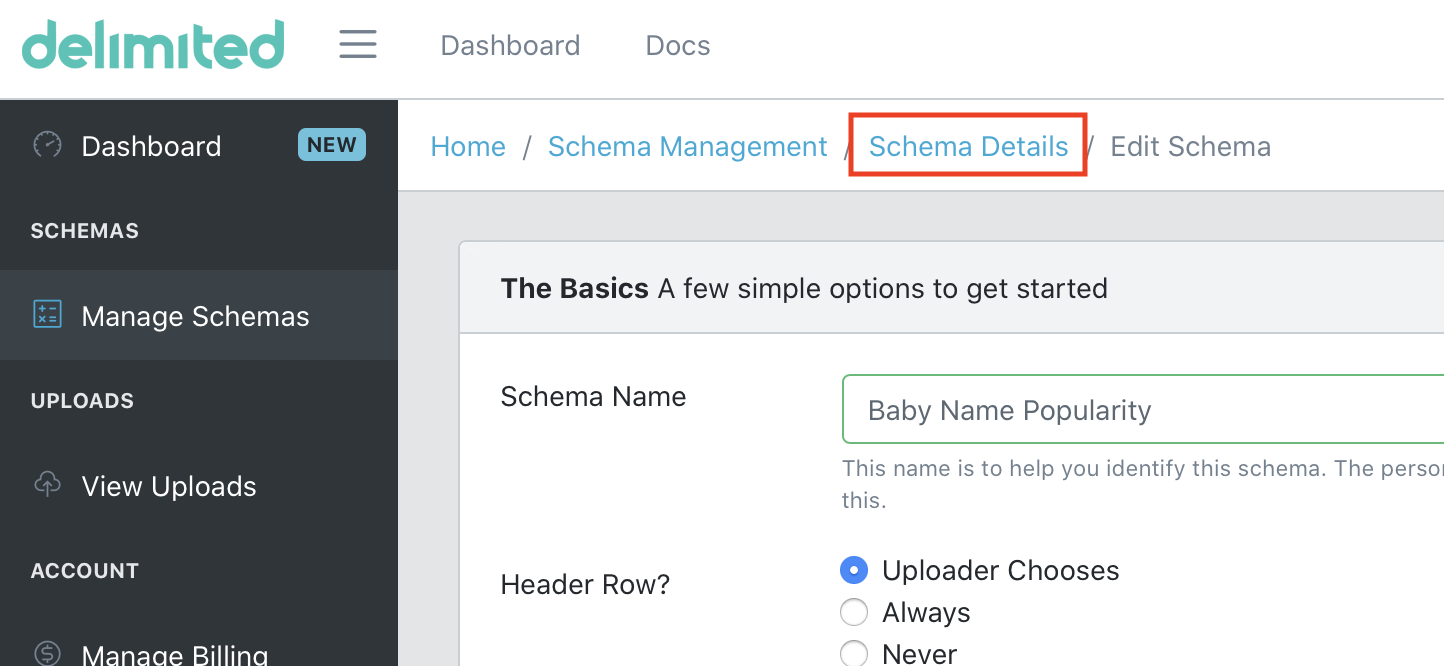
Basic Options
We'll call this schema "Baby Name Popularity." Note that the clerks will never see this name. Since you know that some state clerks provide CSV files with headers, and some clerks don't, select "Uploader Chooses" on the header row so that the clerks have the option to pick which style they prefer.
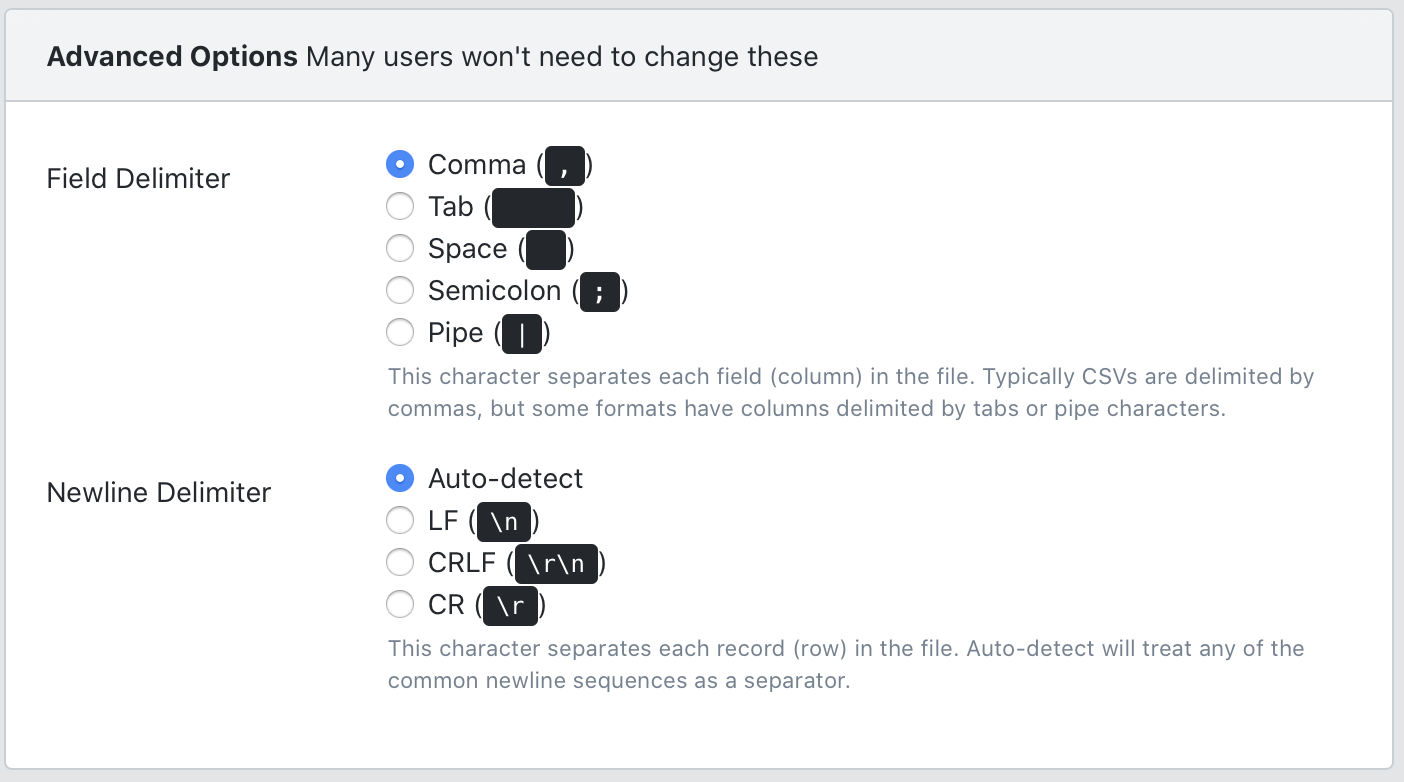
Advanced Options
Take a look at the advanced options on the right. In this case, the clerks are going to use the default delimiters of a comma and a newline character for their file, so no changes need to be made here.
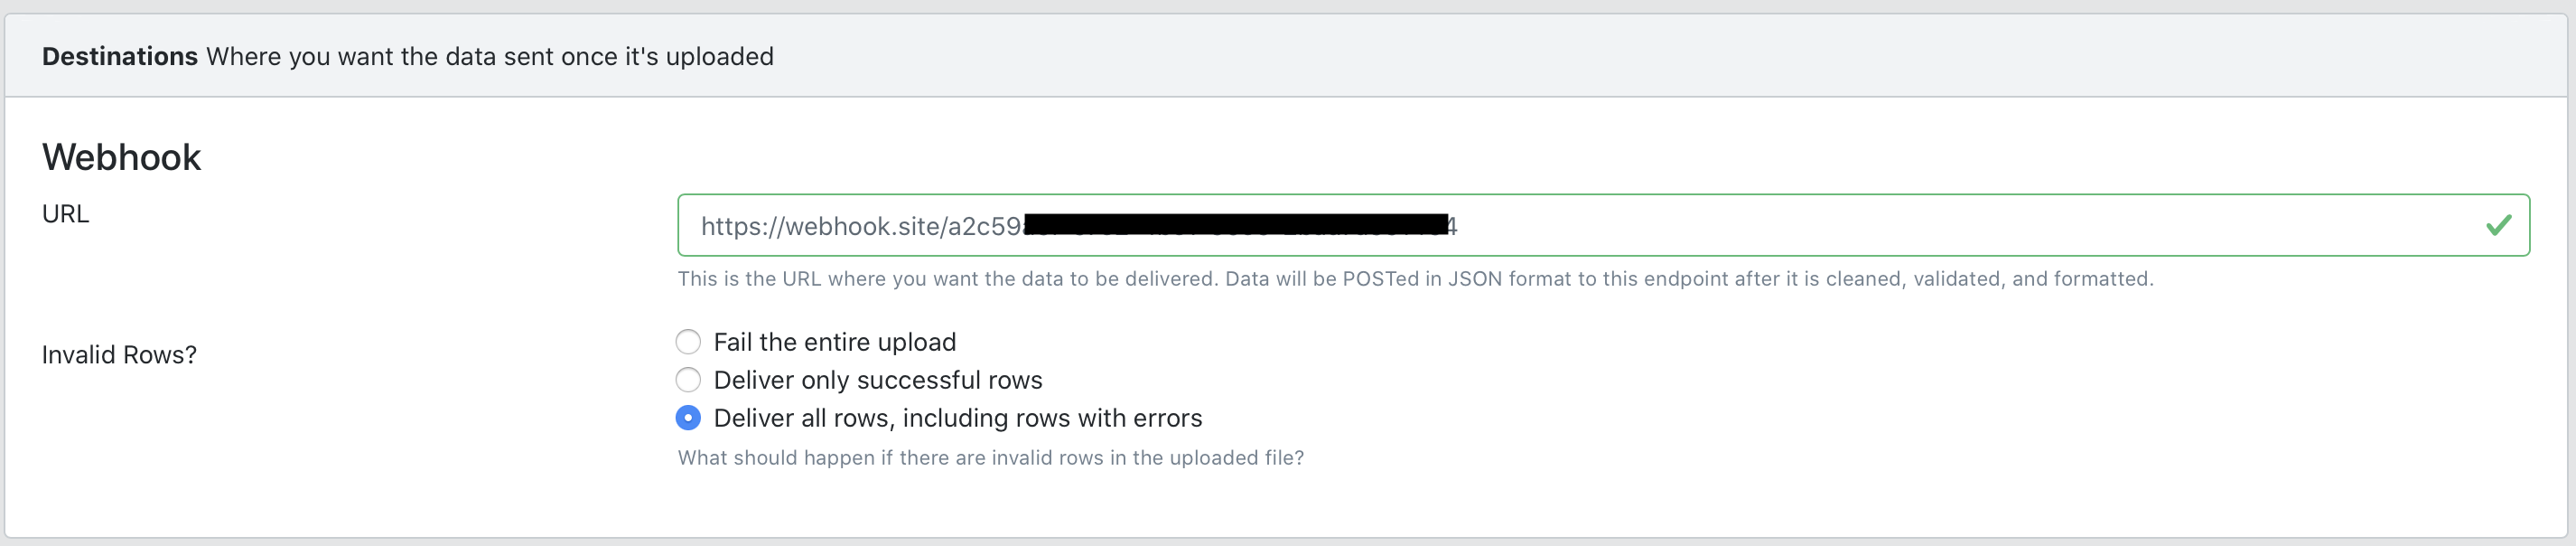
Destinations
Once the data is uploaded, validated, and formatted, it needs to be delivered to your application. Currently Delimited supports POSTing data to a REST API endpoint, a common way to receive data. For this tutorial, we are going to simulate a REST endpoint using webhook.site.
Visit https://webhook.site in a new tab. Leave the tab open and and copy/paste the webhook URL into the Delimited destination field. You can also experiment with the setting of what to do with Invalid Rows. In this case, I selected "Deliver all rows, including rows with errors." This means that the HTTP endpoint will receive all rows.
Columns
OK, now we get to the meat of a schema. This is where we define which columns our application/endpoint/database will expect. We don't necessarily need to worry about what the user's column names will be because they will have a chance to map their column names to what you specify here.
Create seven (7) columns by clicking the "Add column" button seven times. Then, one by one, edit the columns to be the following:
| Column Number | 1 | 2 | 3 | 4 | 5 | 6 | 7 |
| Column Name | Year of Birth | Gender | Ethnicity | First Name | State | Count | Rank |
| Column Description | The year the child was born | The child's gender | The child's ethnicity | The child's first name | The U.S. State where the baby was born | How many babies were given this name | How popular this name was in comparison to other names |
| Alternate Names | Year,YR | Name,Child's First Name | |||||
| Default if Blank | 2020 | ||||||
| Default if Invalid | |||||||
| Validations | Required | Required | Required | Required | Required | Required |
Notice that all the columns are required except for Year of Birth, and we added a default of 2020 so that if the column was not provided it would be automatically filled in.
Save Changes
After your configuration is done, save changes using the button on the "Basics" panel.
Test The Schema
Once the schema has been created and saved, click on "Schema Details" in the breadcrumb trail at the top of the page to visit the schema's details page.
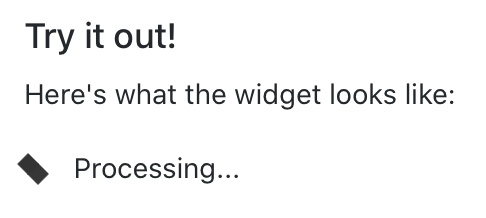
Once on the schema details page, scroll down until you see the preview uploader.

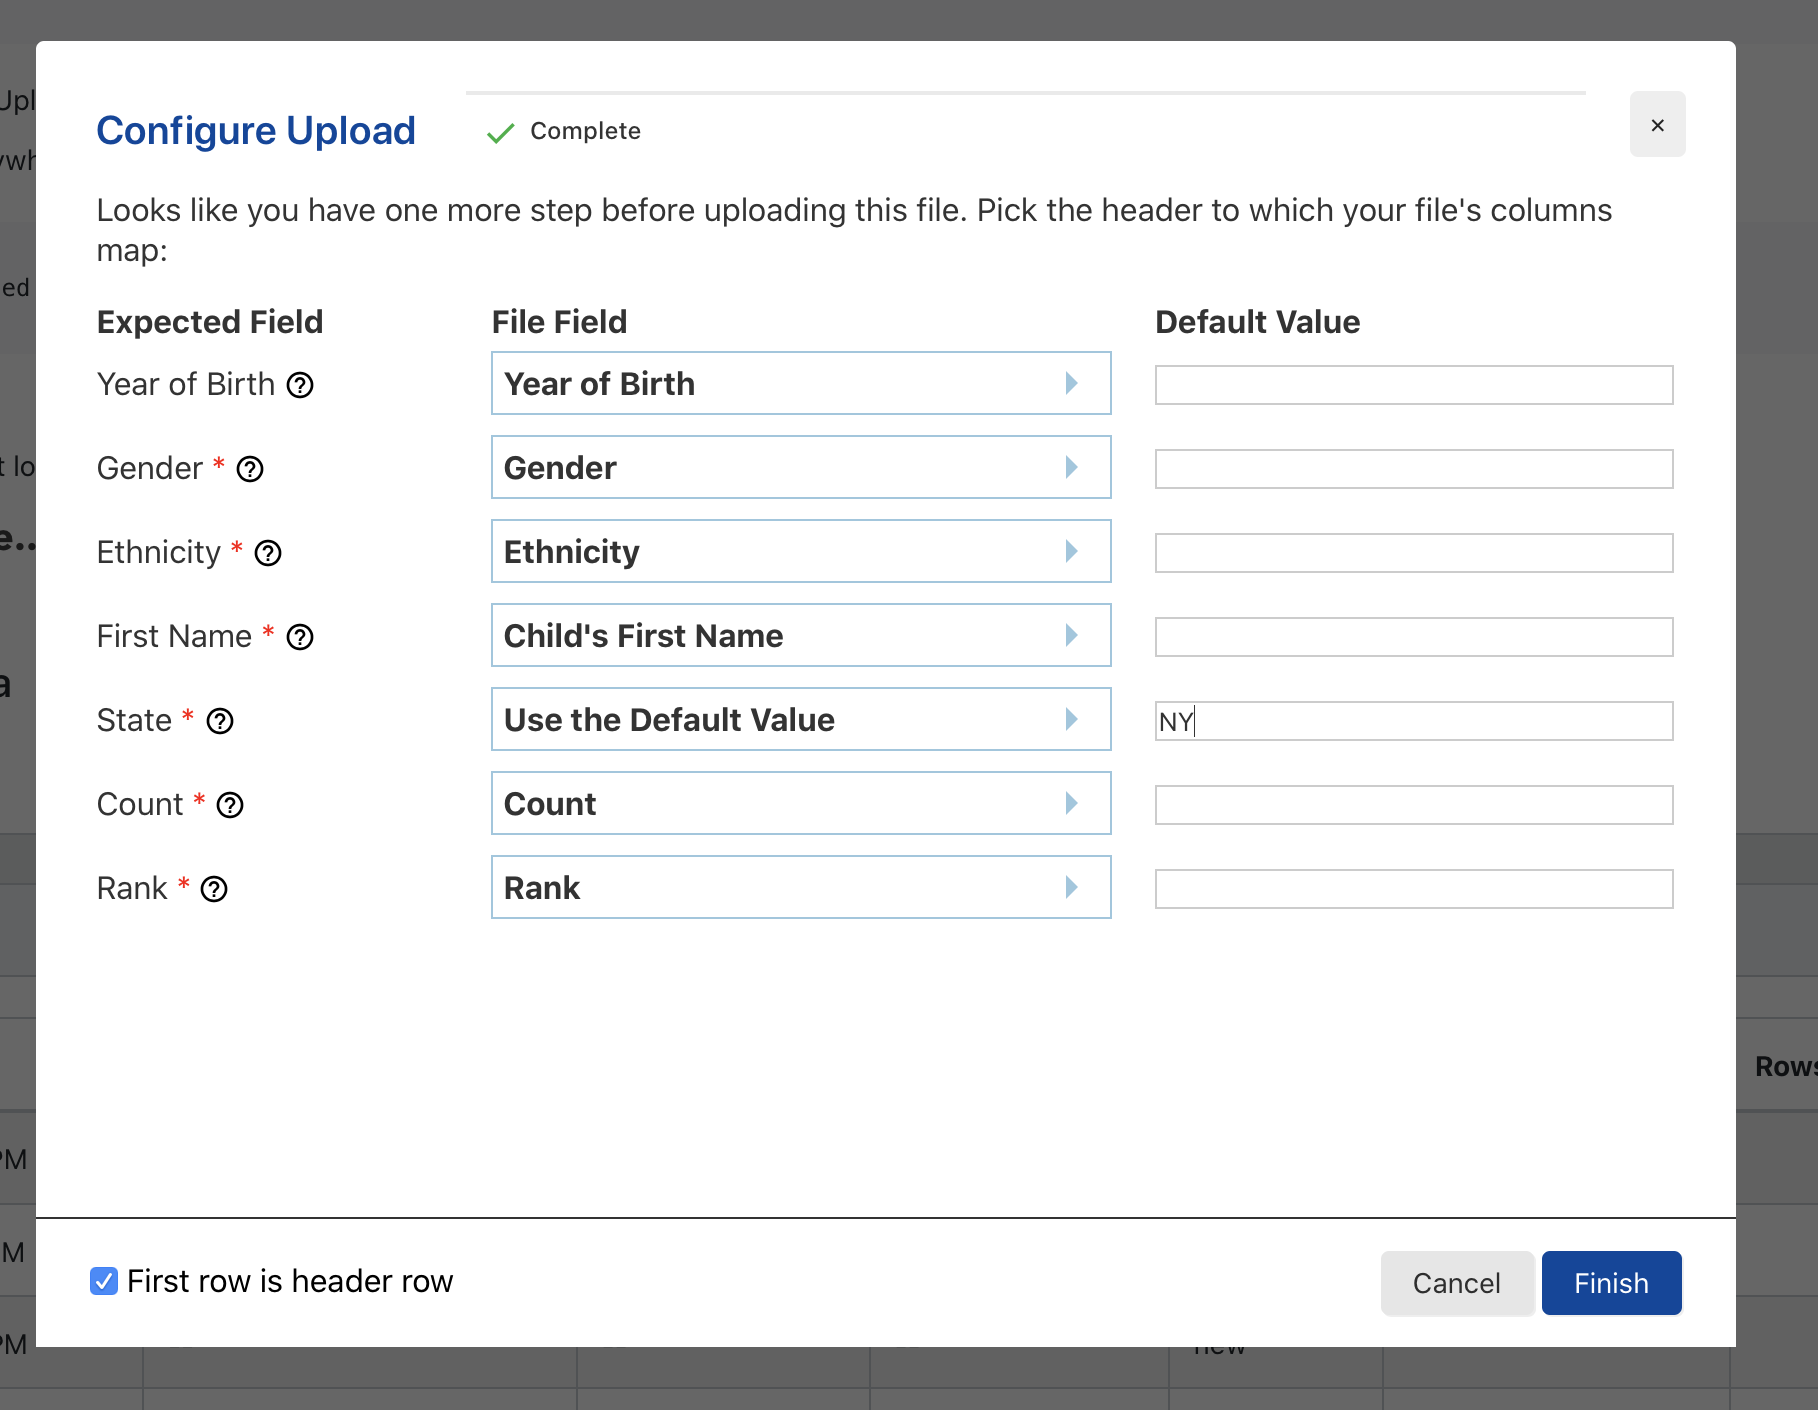
Try uploading a CSV file. Notice the following:
- There is a progress bar the gives the user instant feedback about how their file is being uploaded
- There is a checkbox for the user to choose whether or not the first row is a header row
- Required fields are given a red asterisk
- Each field with a description has a question mark icon that can be hovered over to provide the description of that field
- File headers are automatically matched up with the expected headers based on the names and the alternate names that we chose. For example, the file's field of "Child's First Name" was automatically mapped to the "First Name" column because we typed in "Child's First Name" as an alternate name of the column
- The file field dropdowns show a preview of the first few rows of the file to help the user know which column to pick
- A user can fill in a default value instead of using a column from their file. For example, the State column does not exist in the CSV file that we uploaded. For that reason, we can choose to use a default value that we type in here (as below)
Go ahead and click upload, then look at your mocked webhook site.
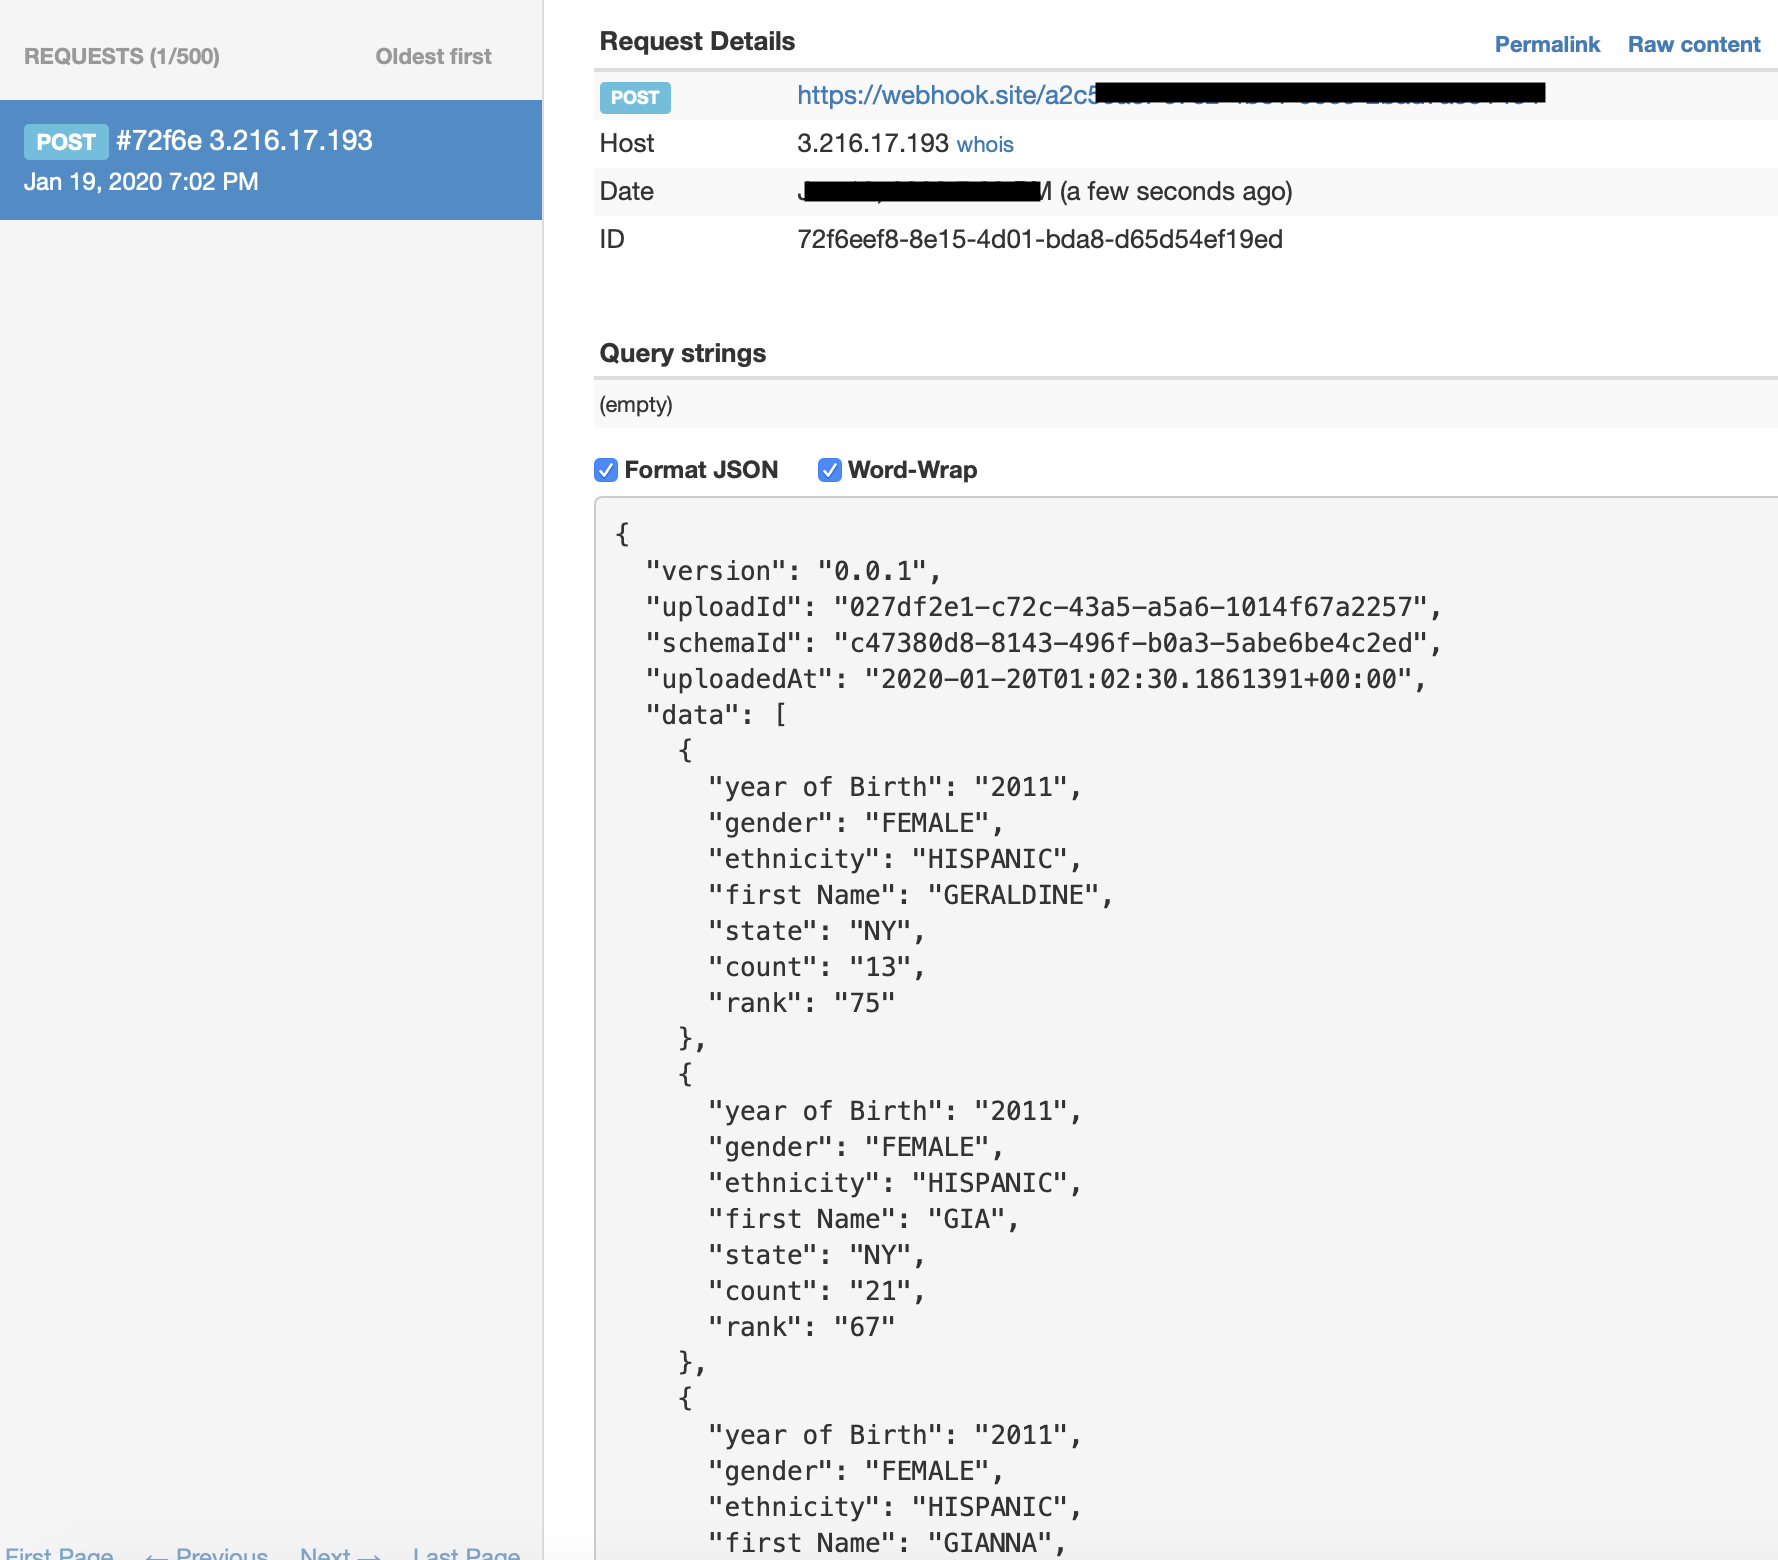
Once it's done, go and look at your webhook.site tab. You should see the data coming through, having been validated, formatted, and structured.
Installing the Widget
Once you've tested and validated that your widget works, it is time to install it onto your site.
On the same page you tested your widget, look for the two code snippets. The first is what you will paste once only, just before the closing </head> tag of the document. The second, you can put anywhere you want the upload widget to appear.
Conclusion
In this tutorial you saw how simple it is to use a little configuration to replace weeks of work to build a user- and developer-friendly upload widget that can push data straight into your application. Now try creating your own!